Smooth surface measurements present unique challenges. These surfaces, often part of fragile components, must meet strict quality standards. They typically have very low average roughness and may be transparent, anisotropic, or defective. These characteristics make it difficult to extract valuable surface information accurately.
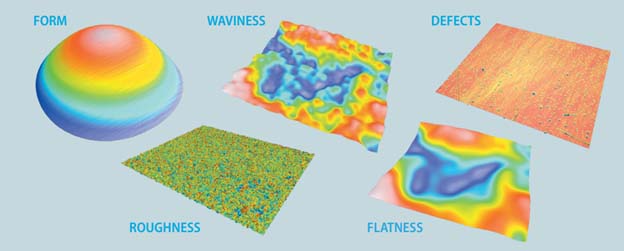
Smooth surfaces, created through precise polishing, coating, or etching, have nanoscale roughness. Measuring their form, roughness, waviness, flatness, and defects is challenging but crucial for research and industry quality standards. Accurate assessment is vital for product excellence and scientific progress.
Effective measurement systems for smooth surfaces must:
- Preserve the integrity of the surface
- Offer high resolution in all axes
- Ensure accuracy and repeatability
- Provide comprehensive sampling
The availability of various technologies complicates system selection. Ensuring the chosen technology meets these criteria is essential for reliable measurement of super smooth surfaces.
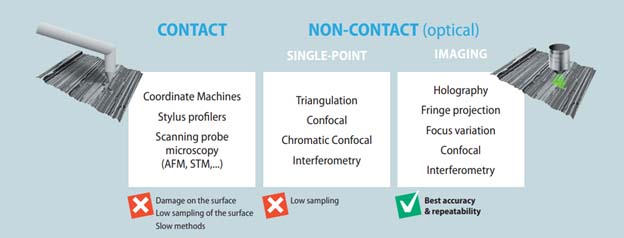
Measurement techniques include contact (e.g., CMMs, stylus profilometers) and non-contact methods. Non-contact options are single-point or imaging-based. For smooth surface measurement, imaging techniques such as interferometry are preferred due to their ability to provide fast, non-damaging measurements with superior sampling and accuracy.
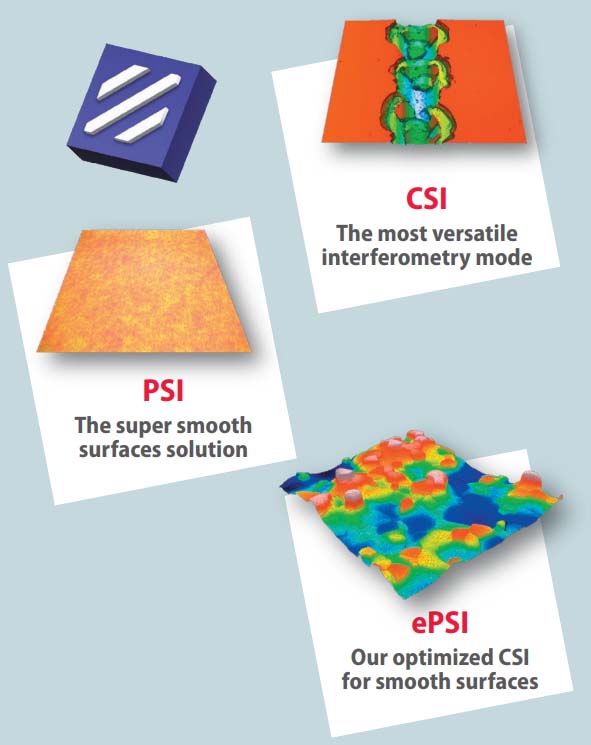
Three Interferometry Techniques for Super Smooth Surface Measurements
Choosing the right interferometry technique for smooth surface topography measurement is crucial to obtaining accurate and reliable results. Here are the primary techniques to consider:
- Phase Shifting Interferometry (PSI): Ideal for measuring super smooth surfaces, and provides subangstrom vertical resolution, making it highly sensitive to minute surface details.
- Coherence Scanning Interferometry (CSI): Suitable for a wide range of surfaces, offers 1 nm resolution, and is also known as White Light Interferometry (WLI) or Vertical Scanning Interferometry (VSI)
- Extended Phase Shifting Interferometry (ePSI): Integrates the strengths of both CSI and PSI, and achieves subnanometric measurement noise, offering precise measurements even for complex surfaces.
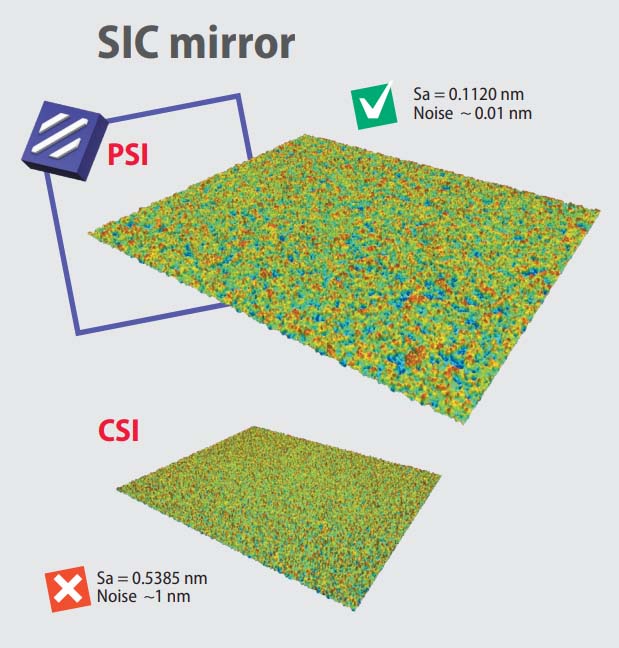
When to Use PSI
Phase Shifting Interferometry (PSI) excels in detecting minute variations in surface texture, making it ideal for super smooth surfaces. It offers significantly lower measurement noise (down to 0.01 nm) compared to methods like Coherence Scanning Interferometry (CSI), providing more accurate and reliable results. PSI is the preferred choice for applications requiring high precision in surface topography assessment.
However, PSI has limitations. It cannot measure steps larger than λ/4 (where λ is the wavelength of the light source), making it less suitable for surfaces with significant height variations. Despite this, PSI remains superior for extremely smooth surfaces due to its high accuracy and ability to detect fine details.
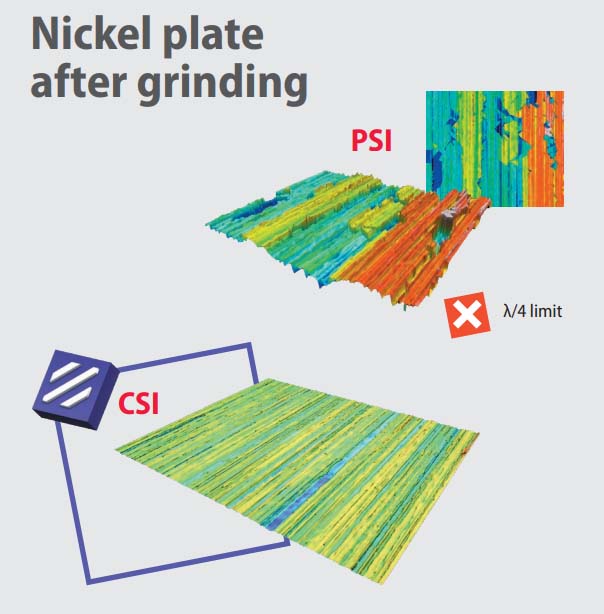
When to Use CSI
Coherence Scanning Interferometry (CSI) is more advantageous than PSI for certain scenarios. For rougher surfaces with 1-2 micron peak-to-valley variations, CSI accurately represents the overall surface topography, providing reliable measurements. In contrast, PSI may produce false steps and inaccuracies, especially on surfaces with significant variations.
CSI is better suited for rougher surfaces or those with significant step heights, offering accurate and reliable topographical data.
When to Use ePSI

Extended Phase Shifting Interferometry (ePSI) combines the strengths of both CSI and PSI, excelling in specific scenarios. For super smooth surfaces with stepped features, such as Silicon Carbide wafers, ePSI effectively handles steps and achieves the necessary vertical resolution, providing accurate measurements where PSI and CSI fall short.
For simple step heights and tilted surfaces, the new ePSI eliminates ripples and distortions seen in older methods, ensuring improved accuracy.
ePSI offers enhanced vertical resolution and versatility, making it ideal for challenging surface measurements where CSI or PSI alone are inadequate. This ensures reliable results for complex surface topographies, maintaining high standards in quality control and research applications.
By understanding these distinctions, you can select the most appropriate interferometry technique for your specific measurement needs.
How to Choose the Proper Interferometry System
When choosing a 3D profilometer with interferometry for super smooth surface measurement, consider the following factors:
Performance is key, encompassing resolution, accuracy, repeatability, and speed. High resolution in both XY and Z axes is crucial for capturing fine surface details accurately. Ensure the system you choose provides precise measurements and can consistently reproduce results. Efficient measurement speed is also important, especially for time-sensitive applications.
Software should be user-friendly with automation capabilities to streamline workflows and increase efficiency. Look for systems that offer intuitive interfaces and robust features to enhance the measurement process.
Versatility is essential. Opt for multi-technique systems that offer future-proofing, cross-validation, and adaptability for various applications. These systems provide the flexibility needed to handle different measurement tasks effectively.
Avoid closed solutions that limit flexibility. Instead, prioritize systems that balance these factors to achieve optimal results in both research and development (R&D) and quality control environments.
Conclusion
Accurate super smooth surface measurement is essential for maintaining high-quality standards in both industrial and research settings. By selecting the appropriate interferometry technique and system, you can achieve precise and reliable measurements, ensuring product excellence and scientific advancement.
For more detailed information, refer to Sensofar’s white paper “Measuring Supper Smooth Surfaces: Exploiting the Potential of 3D Optical Profilometry.” You can download the complete article below.

